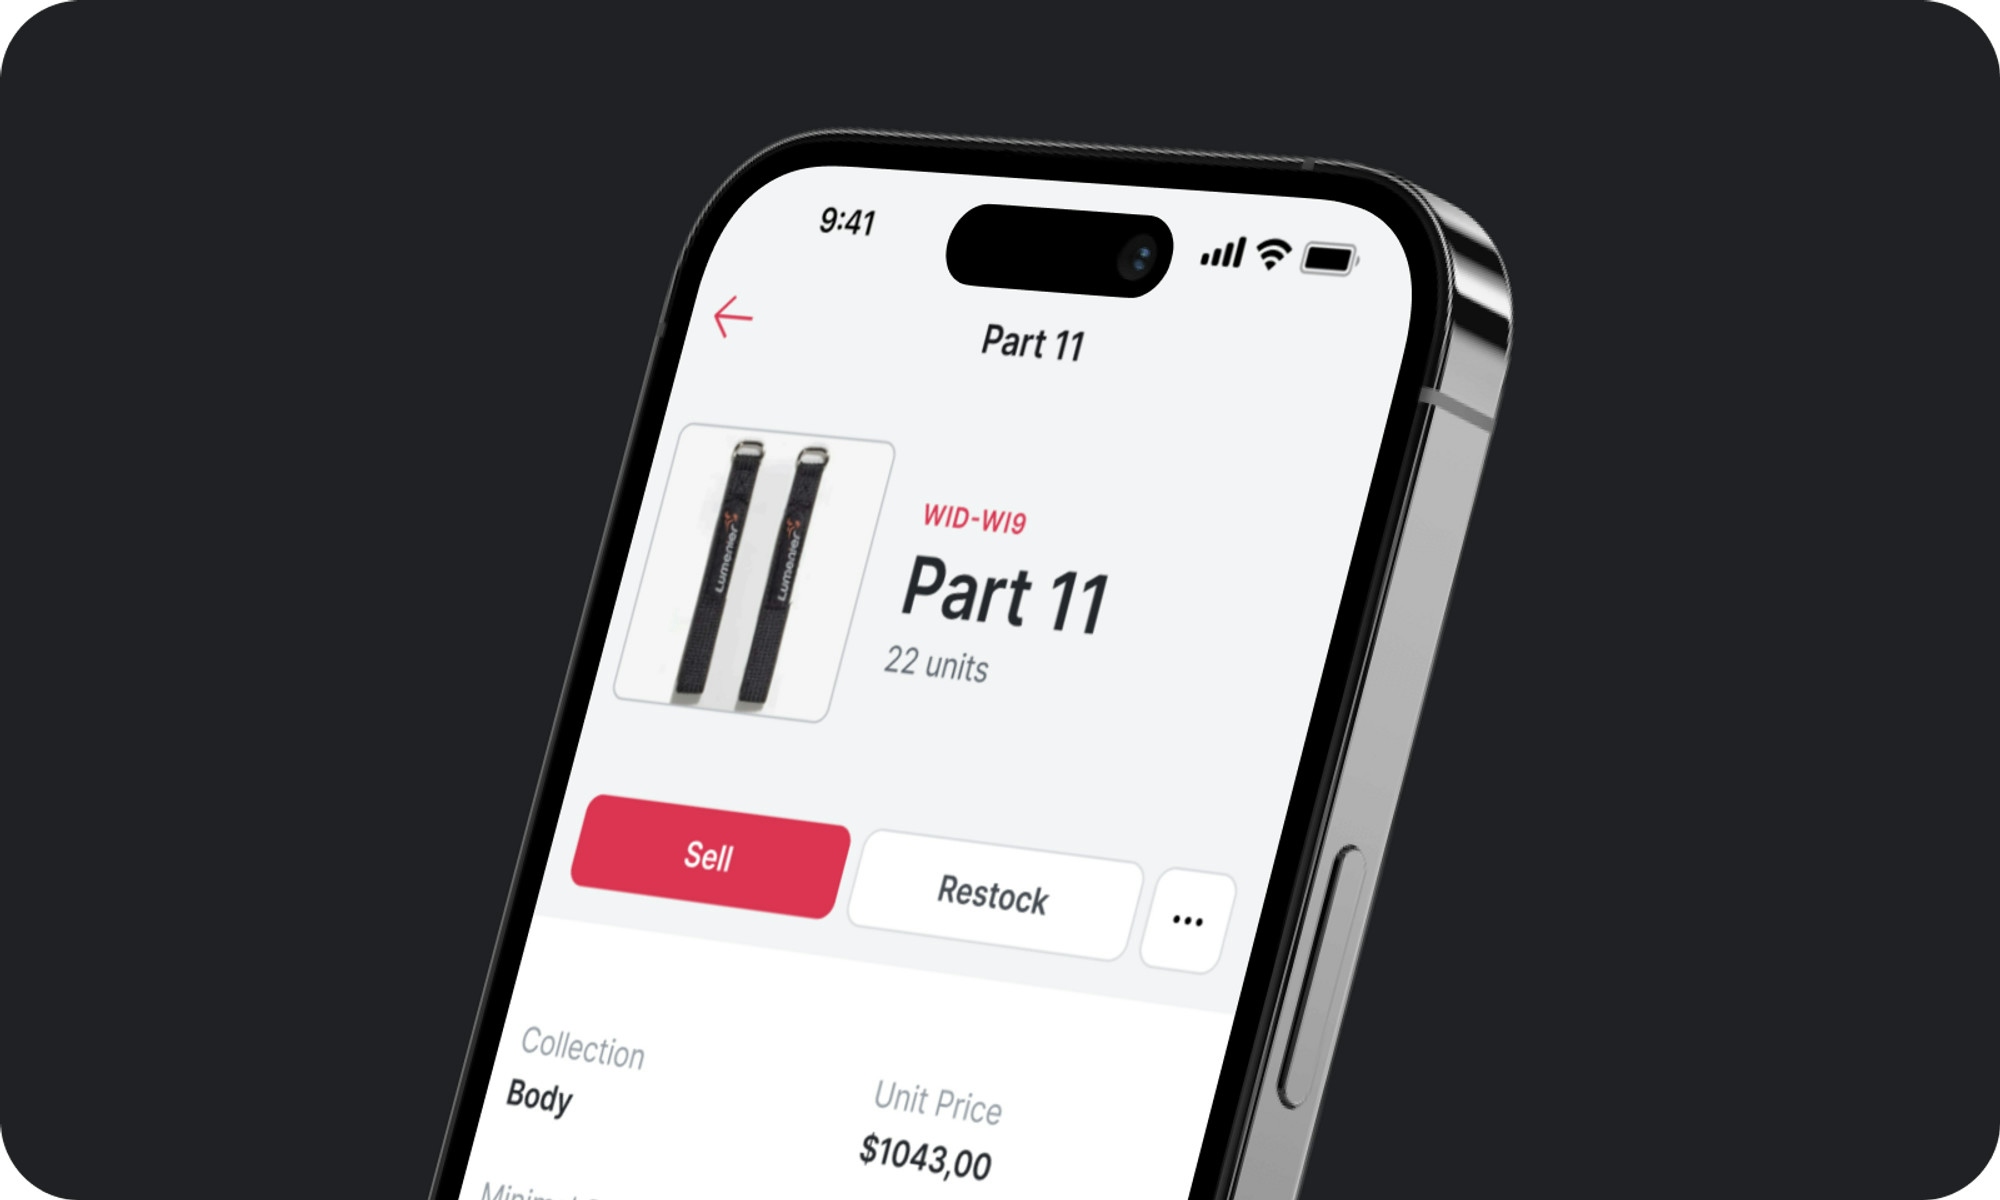
Traditionally, building your own business software has been a cumbersome, expensive undertaking. Whether you were custom coding it from scratch, or hiring a development agency or freelancer to build it for you, the process was lengthy, the learning curve steep, and the whole project was expensive.
These days, with access to no code platforms, the pains of traditional engineering are eradicated. These tools enable people without coding knowledge to quickly make an app for free.
In this article, we’ll look at the steps involved in the no code app creation process. From planning and ideation, to the creation and deployment of your very first app, we’re going to give you the confidence and skill to create powerful software.

If you want to learn to make an app, take the free course at Udemy
Take the coursePlanning out your free app idea
Before you can begin app design, there are some important foundational details to consider. If you’re looking to build an app that will be successful, you want to have a strong understanding of your own vision. This is how.
Does my free app solve a real problem?
Software is one of humanity’s greatest tools because it solves life’s biggest problems with an amplified level of efficiency. Every great piece of software started as a question:
“How can I solve this problem?”
Whether you’re building an inventory management app aimed at optimizing your business workflows or a simple quiz app to engage your community, there is a problem that needs solving at the heart of it.
So ask yourself, “Will my app solve a real problem?”
If the answer is yes, then you’re already well on your way. Remember, it’s always fun to make something cool, but what you really need to do is make something powerful, useful, and necessary.
Android apps, iOS apps, or web apps?
Next, you need to consider your app’s target audience. Is it people who work at your organization? Your e-commerce store customers? Is it a native app for iPhone users? Android users? Depending on who your target audience is and the device they’ll be accessing your software from, you’ll have some fundamental choices to make before you can begin building your free app.
Depending on your target audience and use case, you’ll need to select the appropriate no code app builder. For example, Glide is the perfect solution for making free apps that are deployed within a business or organization. We call these ‘internal tools’. Their goal is often to optimize one or multiple workflows in your business.
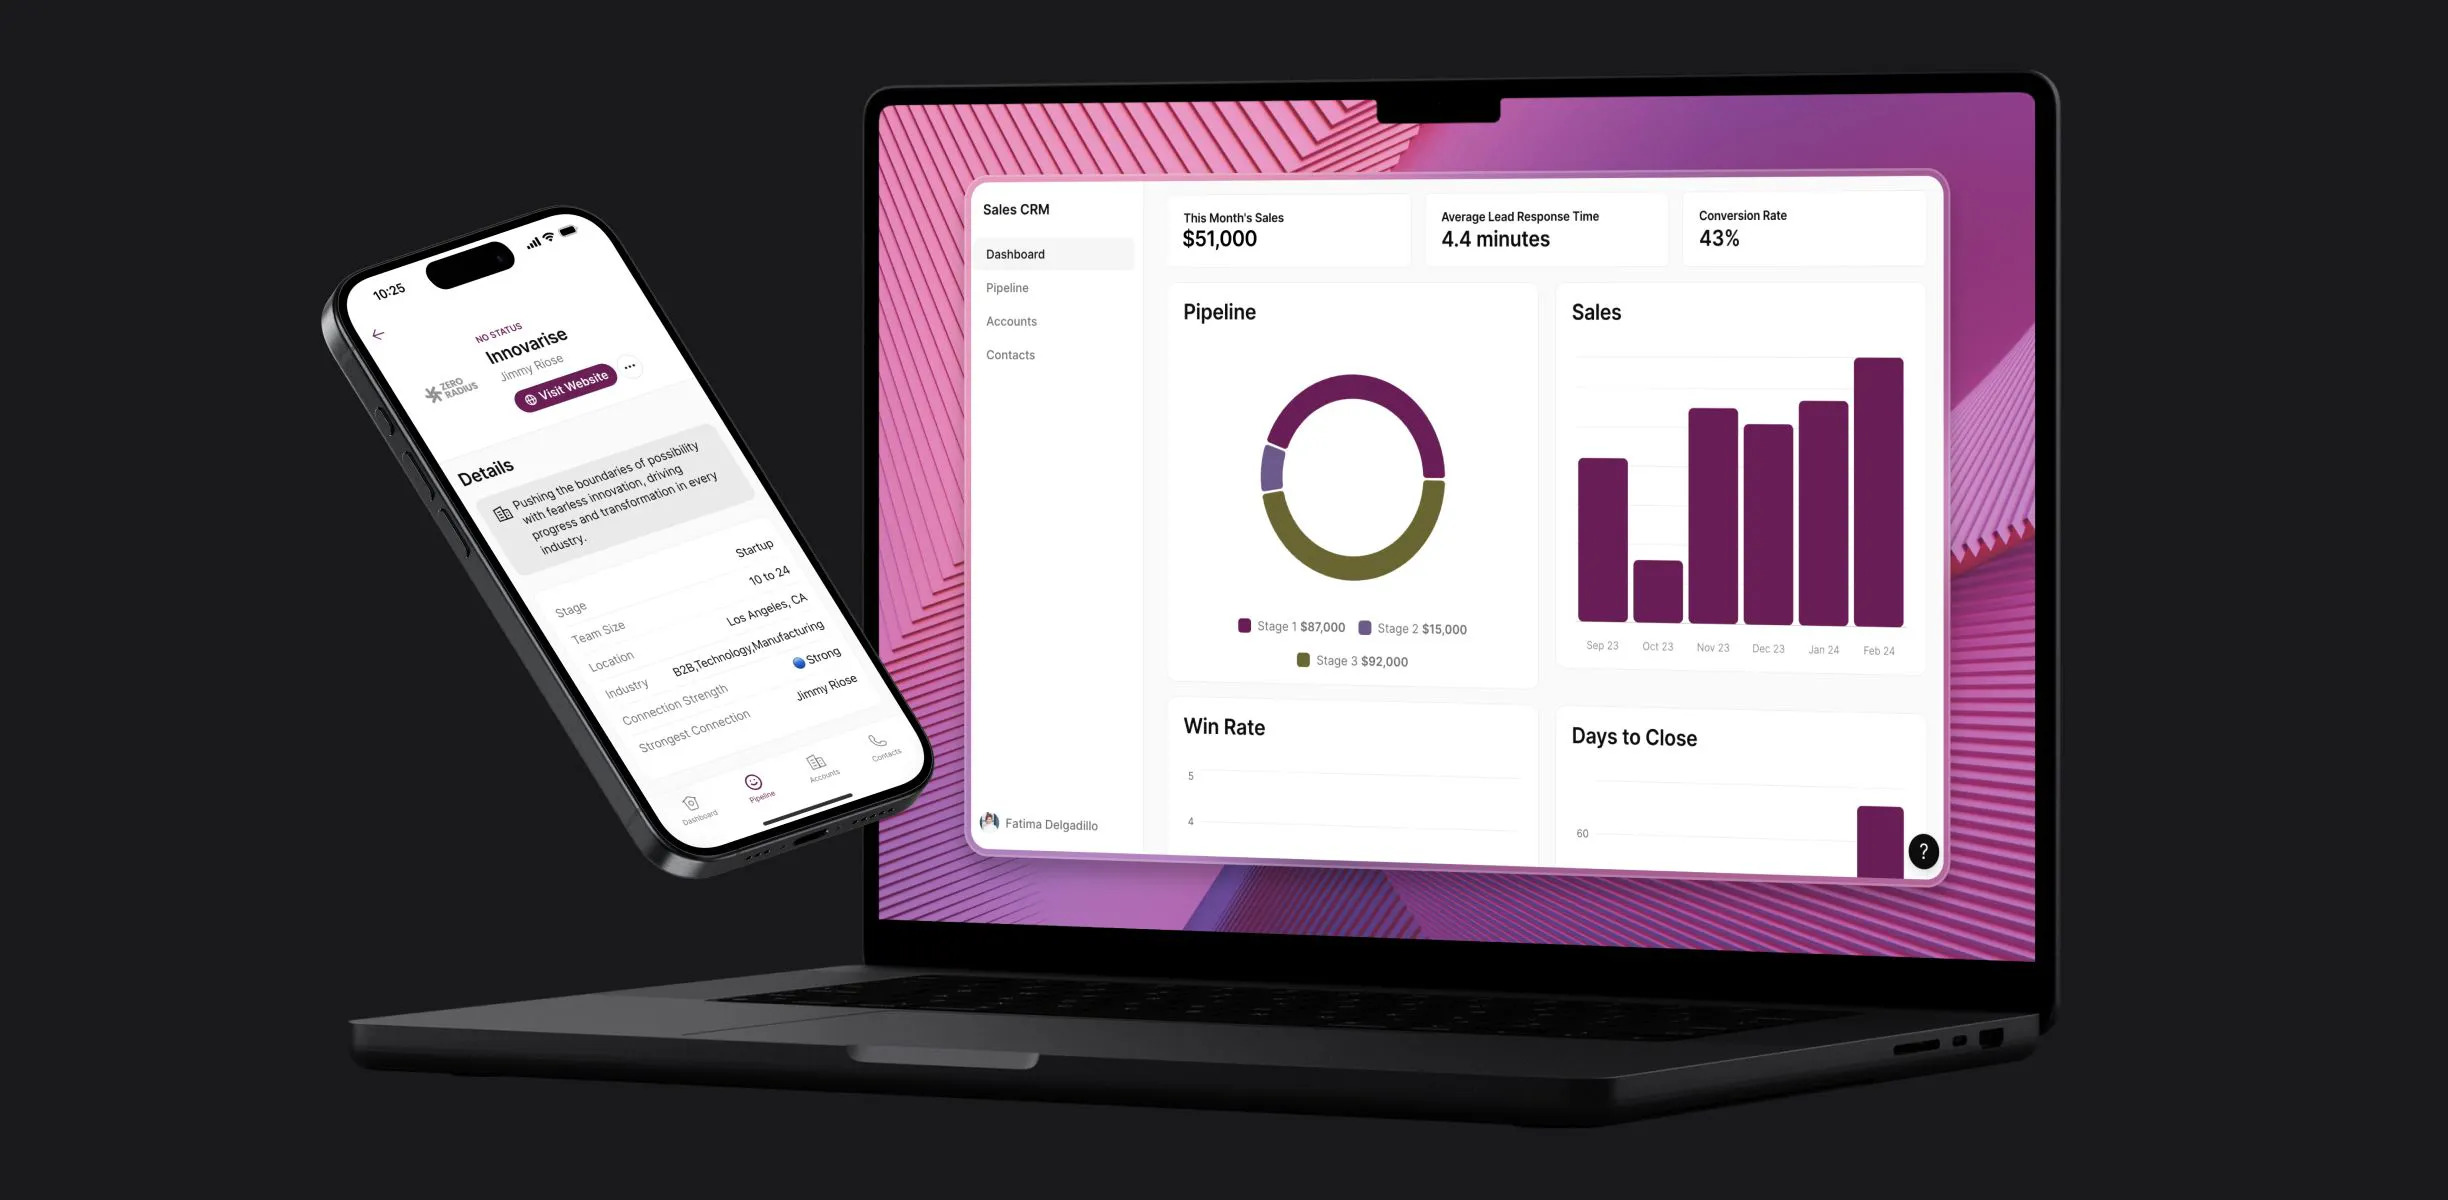
For instance, you may have multiple Google Sheets containing sales performance data. With Glide, you can make a free app that pulls the data from those sheets and creates a user-friendly app interface on top of them. Your sales team can load this free app on their mobile devices while they’re in the field—or on their laptops while in the office—and update or interact with the tool much more effectively than interacting with a spreadsheet (especially on mobile devices.)
If, however, your target audience is on the consumer end, you might consider a no code mobile app development platform like FlutterFlow that allows you to publish a native app on the Apple App Store, or Google Play Store. If you’re looking to build apps for monetization, through in-app purchases and the like, there are backend tools specifically created for that as well.
There are also many other no code platforms out there that specialize in unique use cases, such as Appy Pie for chatbots or WordPress for websites. It’s important to do your research and pick the best option for your needs before you start developing your custom app.
Much like how a programmer would consider various programming languages before starting a project, a no code app creator must consider the various tools at their disposal.
Creating a wireframe for your free app
When it comes to software development, wireframing is essential. Wireframing is the practice of sketching out your app’s screens and the user journey through your app before you start to build. This process can save you a lot of time in the long run.
What happens when a user clicks this button in my app? When they log in for the first time, what should they see that won’t appear the second time? What user roles do I need to assign, and what sort of access to screens and content does each role receive? Do I need every screen accessible from the main navigation, or should some screens only be accessed through the user profile? Do I want my app to send push notifications in real time? What will the user interface look like?
These are just a sample of the important questions that wireframing can answer before you start building your own app.
By planning out your screens, your flows, the decisions users need to make in your app, and the ramifications of those decisions, you can start making your free app without having to go back to the drawing board over and over again.
Wireframing your app can happen on a piece of paper, in a design tool like Miro or Figma, on a whiteboard, or on the back of a napkin. It depends on the complexity of your app idea and the amount of time and thought you need to put into the planning process.
Ready to start making your first free app?
So to recap: before you start diving into your build, it’s important to consider the following:
What problem will my free app solve?
Who is my audience & where will my app be deployed?
What are the screens, workflows, and user journeys in my app?
Once you’ve answered these questions and have selected a no code app maker that suits your needs, you’re about ready to build an app for free.
How to make a free app in 4 steps
Now that we’ve laid the groundwork, it’s time to roll up our sleeves and dive into the no code app development process—step by step.
Step 1: It all starts with your data
When making an app with a no code software development platform, keep in mind that, much like any other piece of software, your app is is powered by data.
Consider any app you use regularly. Does it take user inputs? Does it calculate something? Does it create list items? Does it keep track of counts? All of this is essentially data inside a data table—like a spreadsheet—being presented to you in a user-friendly, easy-to-use way.
So to that end, you should figure out where your app or business data exists—or where you want it to exist. Options can include an Excel spreadsheet, a Google Sheet, or a larger database such as Airtable or SQL. Depending on where your data exists, you’ll need to ensure your no code platform supports it. It’s important that your app can read the data from wherever it currently lives, and more importantly, it needs to be able to write back to that database as well.
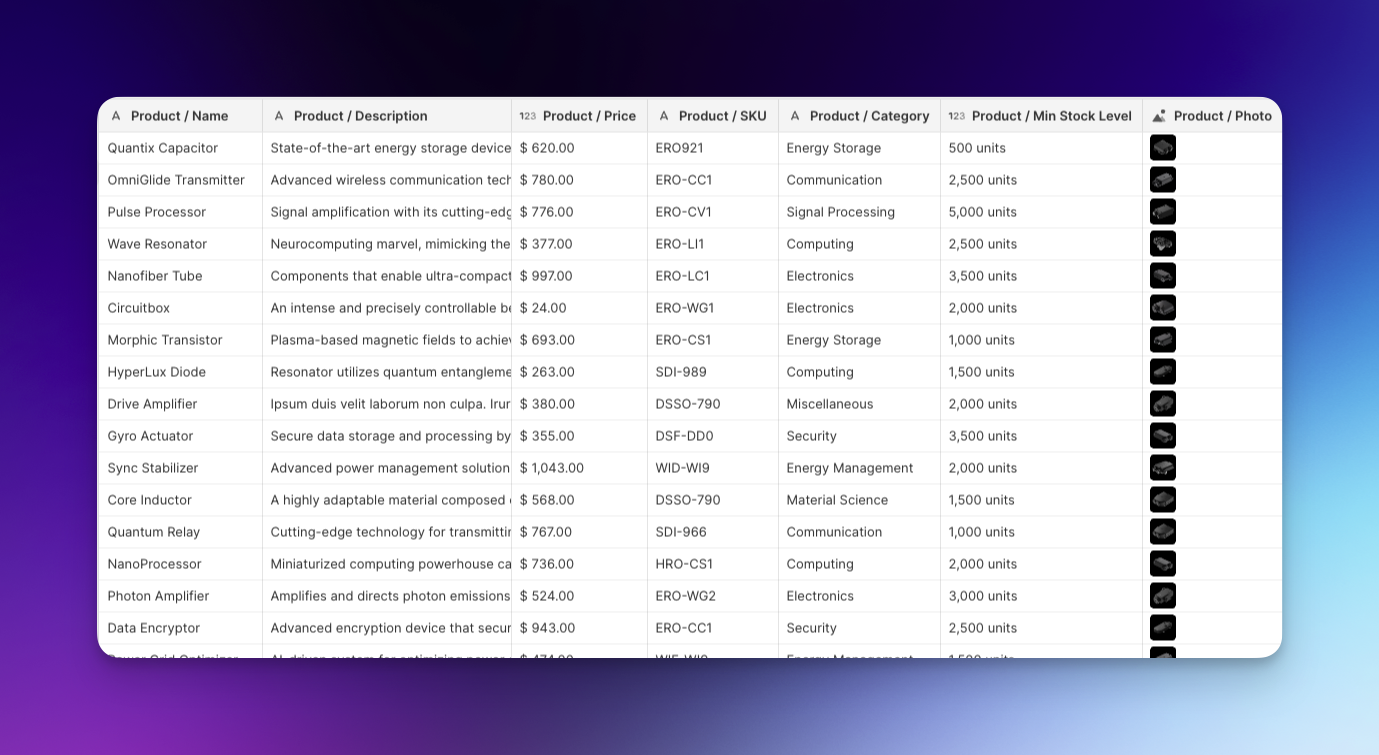
For example, you may be trying to build an inventory management app. You will need to tell your app what your inventory counts currently are. That data might live in Airtable, so your app needs to be able to read that information. When inventory leaves your warehouse, you might want the app to keep track of that by reducing the ‘in stock’ inventory count, so your app needs to be able to write the new number back to your Airtable database.
Glide—and other no code app builders—generally provide you with a native database that you can use to get started. In Glide, these native databases are called “Glide Tables” and they live directly in the Data tab within your Glide app. You can rely on Glide Tables to make an app for free.
However, Glide also provides read/write support for existing databases like spreadsheets, Airtable, SQL, and others. This synchronization functionality is available on our paid plans, so it’s out of scope if you’re strictly looking to make an app for free, but opens up a whole new realm of possibility if you’ve got the budget.
In summary, keep in mind that every app is just data presented to you in clever, engaging ways. When you start putting the data first, it helps you conceptualize your app in a way that allows you to navigate the building process more intelligibly.
All of this to say, your first step is to either:
Import your existing business data into the no code platform of your choice, or
Create a new database in your no code platform or in a 3rd party database tool.
Once you’ve signed up for a free Glide account, you can create a New App and then navigate to the “Data” tab when you’re logged in to the builder. From there, you can import your data or create a new Glide Table as a starting database. Keep in mind that you can add as many databases as you need, and in fact, almost all apps contain multiple databases.
Once your data is in place, it’s time to start building your layouts.
Step 2: Design layouts & screens for your free app
With your data loaded, it’s time to start creating your first few app screens and adding some interactive components. This is where the wireframing preparation work you did really comes in handy. Let your wireframe act as a guide as you start adding screens and designing them for your users.
When you’re using Glide, you can click to add a new screen to your free app from the “Layout” tab in the builder. One important consideration when adding a screen: which database is that screen going to draw information from? You’ll be asked to pick a data source each time you’re adding a new screen to your Glide app.
Once you’ve added a screen, you can begin to drag and drop to add new components to that screen. Do you need a form? A multi-column content container? How about a call to action button or two? Maybe you want your users to be able to log notes on that screen or leave comments and reviews.
Depending on your project, you can add as many or as few components to each screen as you need.
One of the powerful components of Glide is the various “Collection” components. These Collections act as multi-screen components because they allow you to display all the data from one of your databases without having to add each one manually.
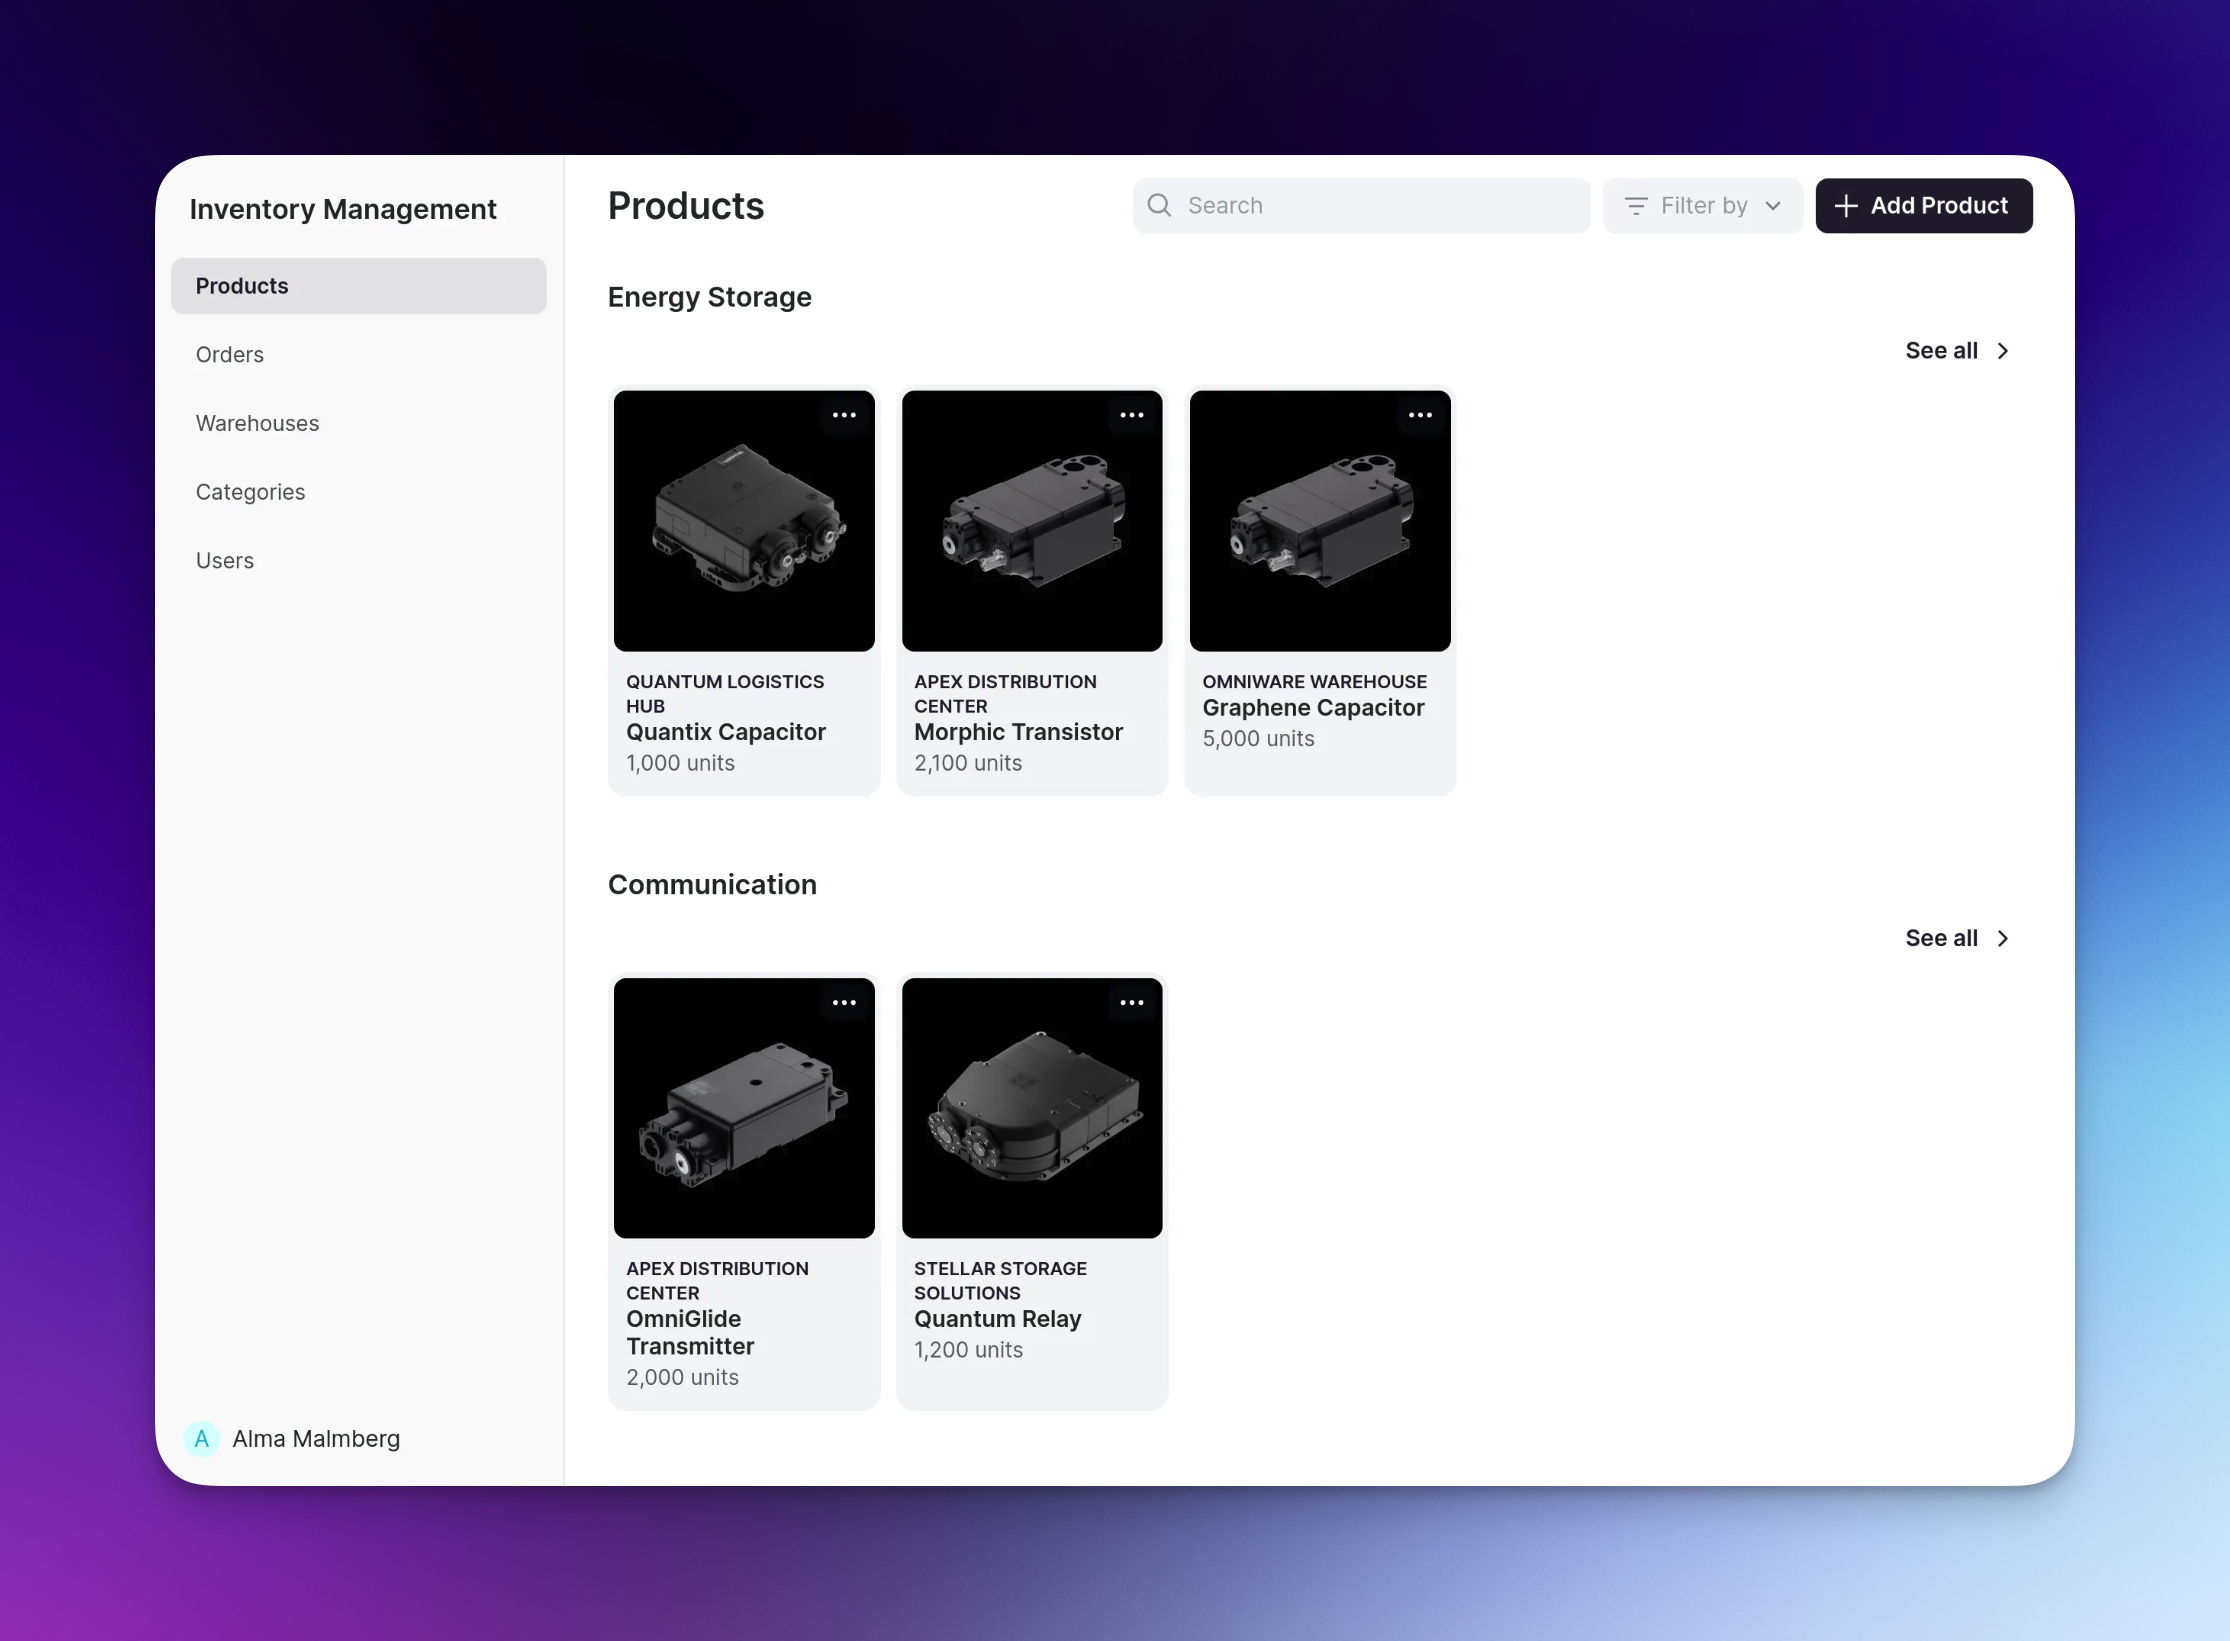
To go back to the inventory management app example: If you have imported all of your inventory into Glide, rather than adding each item individually, you can simply add a Collection, select your inventory database as the source for that collection, and voilà! All of the inventory within that database gets presented neatly, in a format of your choosing (table, grid, kanban, etc.).
Designing the layouts and screens for your free app requires a great deal of thought and intentionality. These are the pages that your users will be navigating. Providing them with a clean and enjoyable experience is essential to them adopting your app and returning to use it.
Think about all of the great software you use on a daily basis, and try to extract lessons from them. Small businesses and bigger software organizations alike invest in UX (user experience), so there’s a lot to be learned from just exploring the existing apps you use through a new lens.
What do they do well? What do you wish was different? How do they direct your eye to the important areas within the app? How do they keep screens clean yet comprehensive?
If you’re using Glide, you’ll see that we’ve put a great deal of thought into the user experience behind our screens and components, so you don’t have to think as much about it.
Step 3: Build apps with workflows & actions
While we want to cover workflows and actions as their own steps, the truth is that you might actually build some or all of these workflows simultaneously while you’re designing your layouts and screens. Steps 2 and 3 work really well together, so don’t feel that you necessarily need to do one before the other.
However you decide to approach it, one fact remains: actions and workflows turn your free app into a robust piece of software. In fact, without them, apps are generally quite static. To give you a better idea of what we mean by workflows and actions, here is a scenarios to consider:
In your inventory management app, an admin user scans a barcode to increase the stock of an item. This triggers a workflow containing multiple actions where the inventory count is increased by one, an SMS message is sent to the warehouse manager, and a notification is shown to the users.
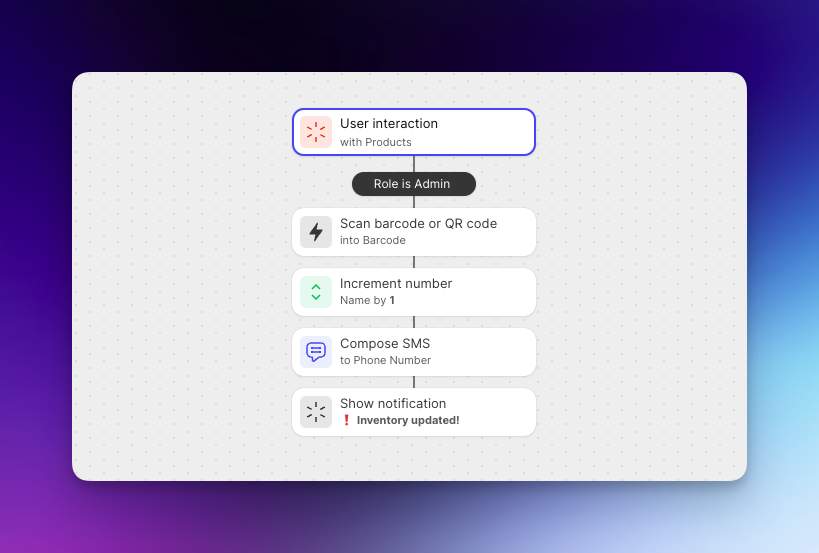
In this example, the workflow kicks off when a user interacts with your app by scanning a barcode. Three subsequent actions follow automatically. You can pre-define these workflows and the actions contained in them, by navigating to the “Actions” tab in Glide, and creating a new workflow.
These workflows can be as simple or as complex as you need them to be. Oftentimes, your workflows might branch off in various directions, depending on various user roles, day of the week, current inventory count, or infinite other considerations.
When you’re building these workflows, it’s again really helpful to rely on the wireframes you sketched in the pre-planning stage of your build. When you’re extremely clear on what you need your app to do, what you want users to do in your app, and what you want the overall experience to be, it will be much easier to design complex workflows consisting of one or many actions.
Keep in mind: A workflow can be as simple as “Open a URL when this button is clicked”. Every workflow doesn’t need to be massive or full of multi-step actions in order to be powerful or useful.
Once you’ve completed steps 1-3, you’re almost ready to launch your app. Just a few details to tune up first.
Step 4: Adjust settings & launch your free app
While it’s often best to leave the fine-tuning to last, again, this step can be tweaked at any point throughout your build. We prefer to start with data and end with settings, but you can generally tinker with your free app’s settings at any point throughout your build without really impacting your screens, workflows, or data.
In any case, there are a number of details you need to consider before deploying your free app. A lot of these details were things you thought through in the pre-planning process and will likely be quick to resolve once you get started.
Common no code software development settings and customization options you need to consider might include:
What will my app be named?
Will my app be available publicly?
Will users need to log in to my app?
Will users need to access the app offline?
What is my app’s color scheme?
Where will my navigation bar appear?
Do I want it to be in dark mode or light mode?
Do I need users to agree to terms and conditions?
You should generally be able to get through these settings and options rather quickly, so this is a great piece to leave to the end. Nothing like finishing your build with some light touches, leaving the quickest and easiest decisions for last.

Once you’ve made all the necessary adjustments to your app’s settings, it’s time to click the Publish button and take your app live. Once you’ve done this, it’s a great idea to open the live app and go through the process of bug testing.
Check that every screen appears the way you want it to, your navigation contains every page you need, your workflows and actions all fire correctly, your data is syncing properly with your third-party databases, and everything else you worked on in steps 1-4 is functioning well.
Once you’re done testing the app, open it up to a few users for Beta testing and feedback. Collecting user feedback is a vital step in building and deploying successful software. Not just early on but continuously throughout the lifespan of your app.
Consider adding a “Feedback” button in your app, where users can submit suggestions for new features or send bug reports at any time while using your software. This way you can continuously iterate and improve your app with time. Good software is software that takes the considerations of its users to heart so it remains relevant and continues being used.
Make your free app using Glide’s no code app builder
We hope this guide has given you a strong grasp of both the fundamentals of app building, and also some of the more nuanced details like thinking about data first, and workflow considerations.
In 2024, you don’t need coding skills to build and deploy a scalable desktop or mobile application. Glide’s no code app development platform offers a capable Free plan for beginners, which meets the needs of many app developers, especially during the early stages of your project. It’s a fantastic way to get your first app or MVP (minimum viable product) launched fast.
As your app evolves, and you need access to more rows of data, 3rd party integrations, AI functionality, or larger-scale databases, you can upgrade your plan appropriately to continue scaling your project over time. You’ll find all the details about our plans and pricing on our website.
To kickstart your development process, we also offer a variety of useful app templates that match numerous business processes, industries, and use cases. By building off of a template, you get all the basic screens and databases you might need right from the get-go, so you spend even less time on building and put that time into fine-tuning instead.
If you need help with building your apps, there are several powerful resources to assist you. The official documentation is a great place to start. You can also enroll in Glide University to watch hundreds of video tutorials and earn your Certification. Or join the Glide community where you can ask a question and receive a response from fellow community members usually within an hour.
Need more hands-on assistance? You can also hire a Glide Expert to help you with your build.
Now that you’re ready to start making your first free app, the only question is: What are you going to build?

