Share Link
Share a link through the user's device.
The Share Link action triggers the device’s share panel, enabling them to share your content via other apps. This will only work on mobile devices.
The Share Link action can be used as an action in the components of your app (like Buttons, Collections, and much more), or it can be triggered along with other actions as part of a Workflow.
Setting up the Share Link Action
Layout Editor
Workflow Editor
Click on the plus (+) sign in the Components panel and select the Component you want to trigger the action.
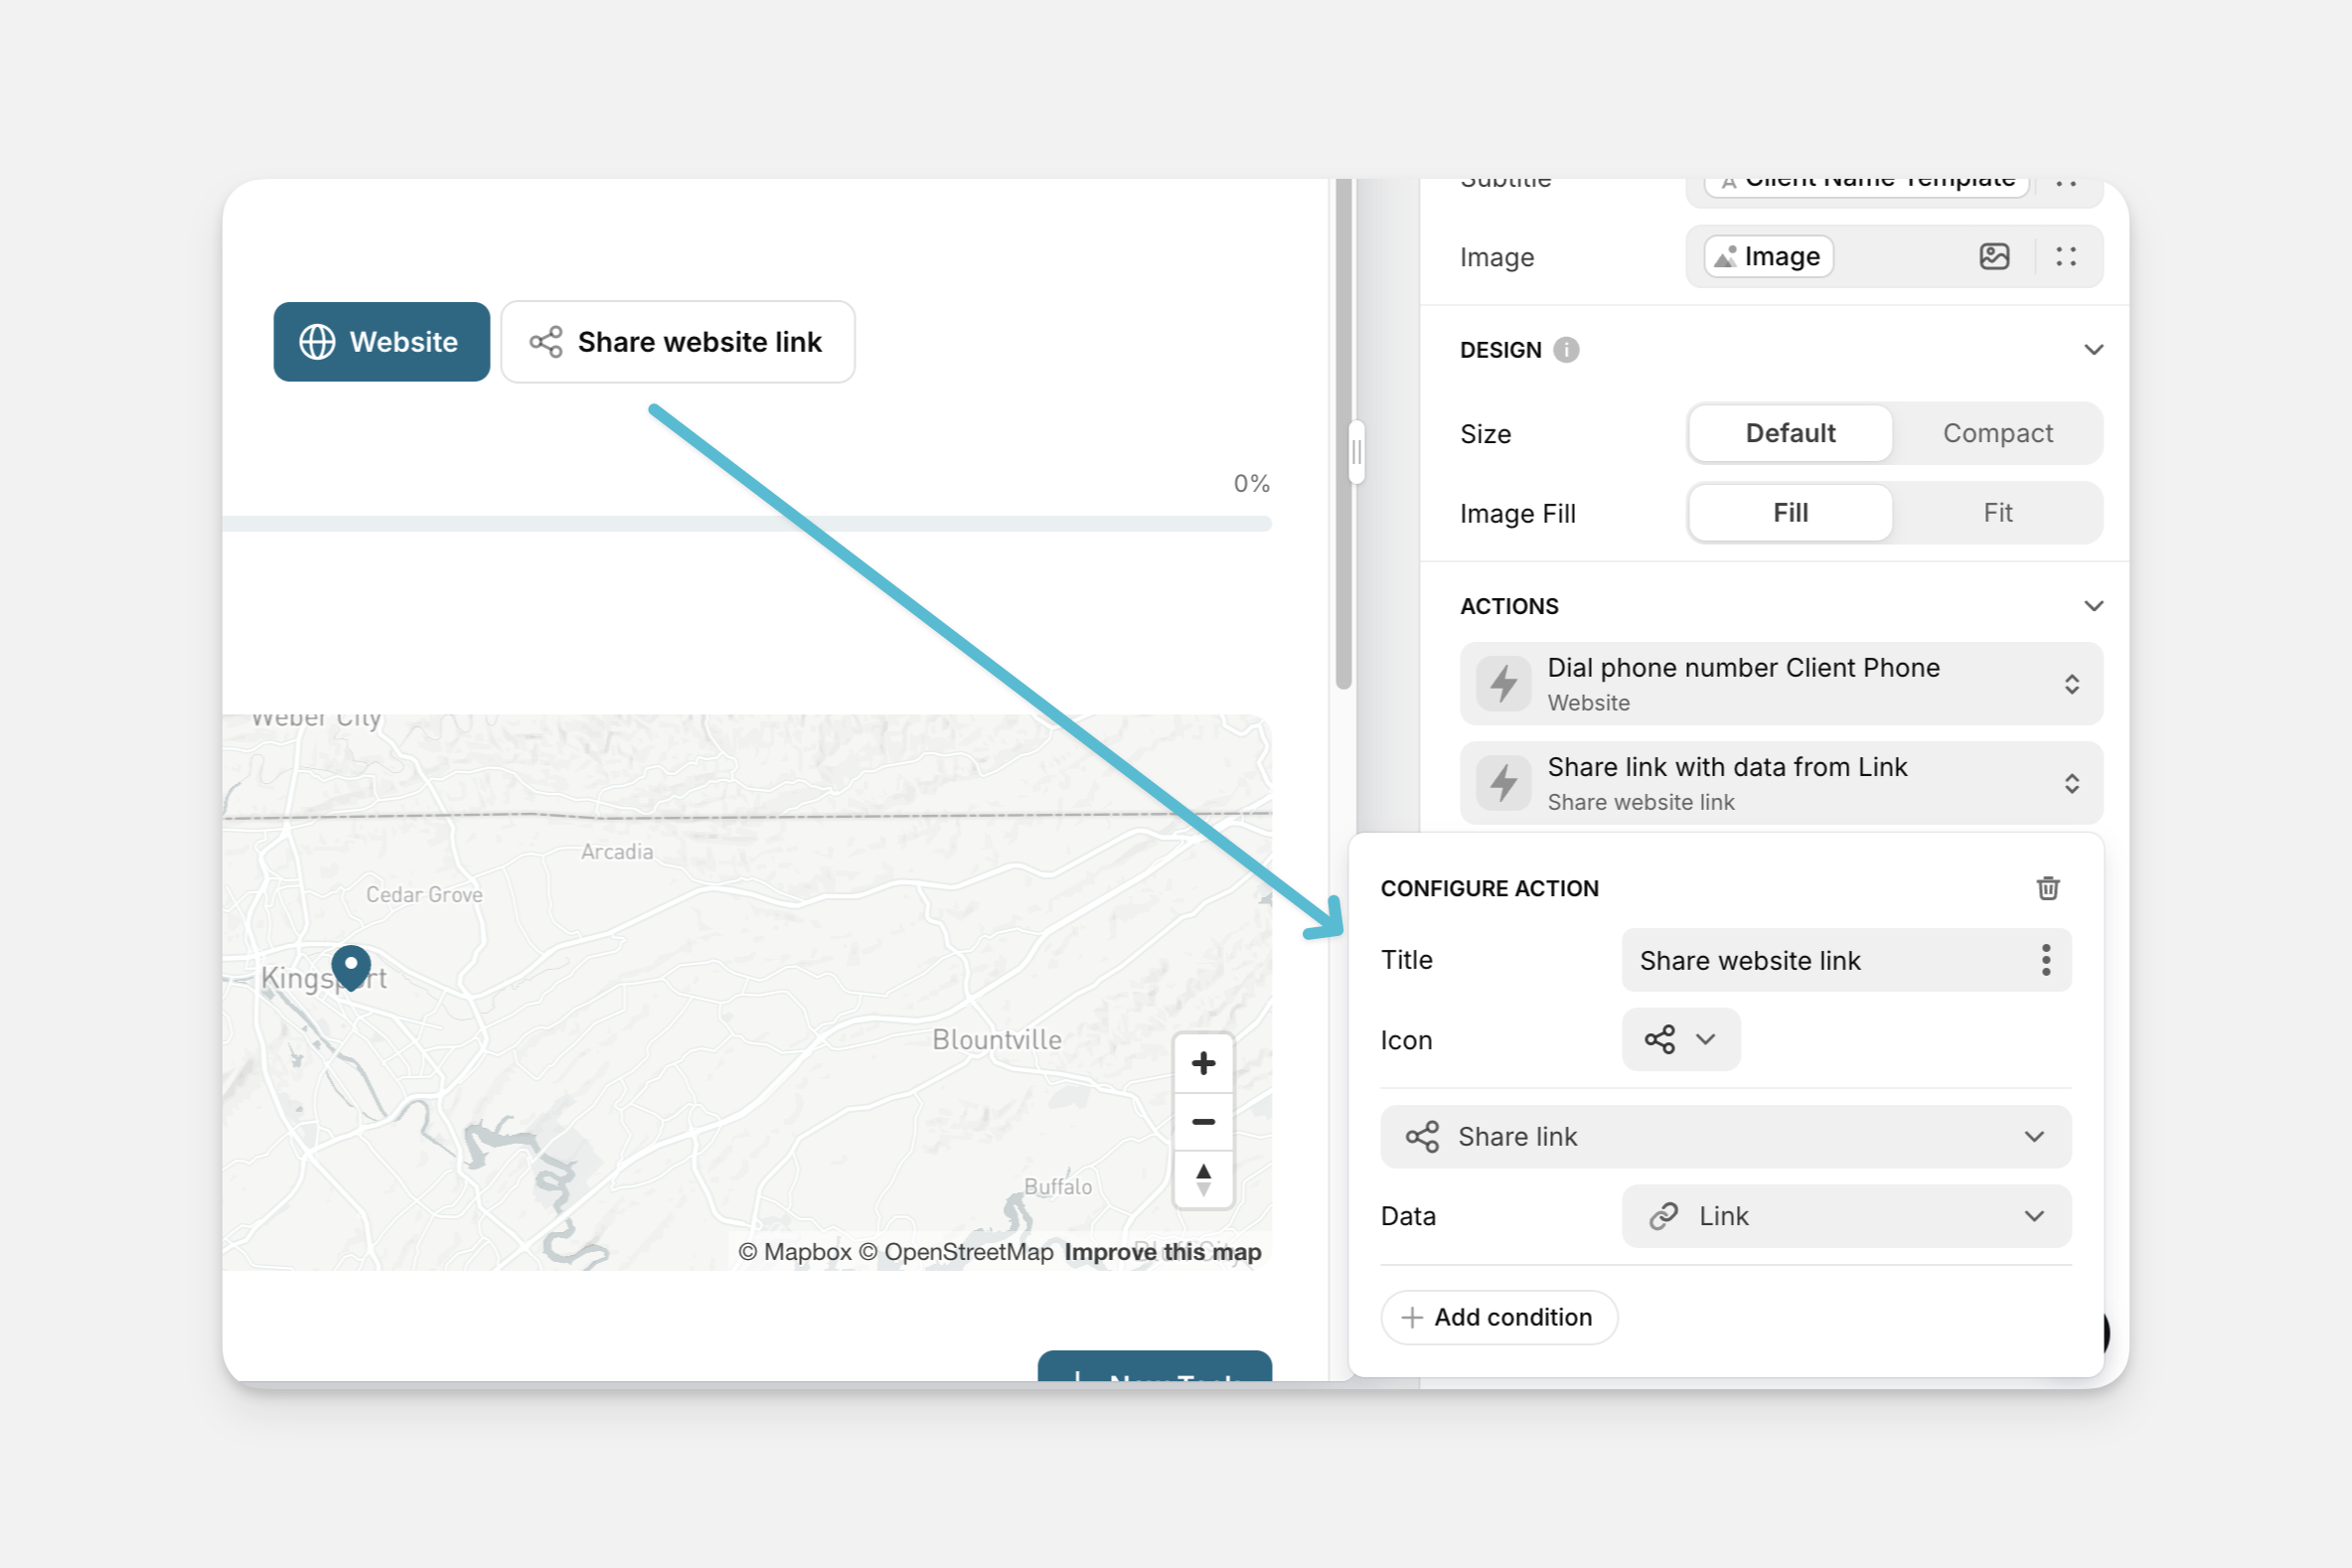
In the General tab on the right side of the Layout Editor, navigate to the Actions section and select Share link.
In the Data field, you can allow users to share any of the following data:
- Static custom text or custom link
- Unique values like Current Date/Time, a Unique Identifier, or the Link to the current screen.
- Data from a specified column in your sheet.
Check the Introduction to Actions page for a full list of components that can be used to trigger actions.